Quick Summary
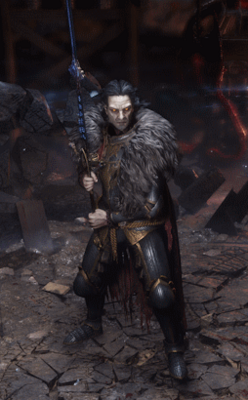
Count Geonor is a unique monster located in Ogham Manor. He is the final boss of Act 1. Defeating him is necessary to complete The Mad Wolf of Ogham. Key points: Count Geonor was originally called "The Iron Count" prior to Early Access. · Count Geonor is one of the potential clients for Heist contracts, which requires retrieving the Crest of Ezomyr.
Count Geonor
| Count Geonor | |
| Count Geonor | |
| Level(s) | 1579 (The Iron Citadel) |
| Location(s) | The Iron ManorThe Iron Citadel |
| Quest(s) | The Mad Wolf of Ogham |
| Damage | Physical, Cold |
| Resistance(s) | 30% (Campaign)75% (Citadel) |
| Modifier(s) | 100% increased Freeze Buildup (Citadel) |
Count Geonor is a unique monster located in Ogham Manor. He is the final boss of Act 1. Defeating him is necessary to complete The Mad Wolf of Ogham.
Encounter
Entering the arena, Crazed Guards will attack. Once the guards are defeated, Oriana will command Count Geonor to kill the character. Geonor will proclaim, "No noose this time. I'll remove your head myself!" and leap into the center of the arena, slamming the ground. The fight will then begin.
Phase 1A
| Skill | Description | Cues | Blockable |
| Slash Combo | Geonor makes various combinations of slashing and thrusting strikes while advancing. | — | |
| Freezing Thrust | Geonor gathers energy in his sword for a brief duration before unleashing a projectile in a straight line across the arena. This attack deals cold damage and has high freeze buildup. | Red flash First Ones' ire. Easy prey! | |
| Impaling Charge | Geonor points his sword and charges forward. If Geonor hits the character, they will be stunned and knocked back to the edge of the arena. If he misses, he will follow up with a Frost Cleave. | Red flash Run little rabbit! You'll pay with your life! | |
| Frost Cleave | Used following an Impaling Charge that misses: Geonor cleaves a very large semicircle behind him while turning around. This attack deals cold damage. | — | |
| Ice Wall Combo | Geonor creates two walls of ice in a long V shape. He then gathers up ice around his sword and slams down the middle. This attack deals cold damage. | Red flash No escape. You will falter. First dawn's frost. |
Phase 1B: Wolf form
After being reduced to 75% life, Count Geonor will periodically plunge his sword Agnar deep into the ground, leaving it in place. He will then shapeshift into the form of a wolf. This begins a wolf form sub-phase.
Geonor attacks and summons Court Werewolves. Meanwhile, runic circles of frost slowly build around Agnar. The runes are expended to freeze the character if they step into the circle.
After a period of time, Geonor will shapeshift back into human form and shout, "Agnar, to me!" recalling the sword to his hand. If the runic circle was not expended earlier, Agnar will release a wave of cold damage in a large area around Geonor as he catches it. This ends the sub-phase.
| Skill | Description | Cues | Blockable |
| Lunging Bite | Geonor lunges forward and makes a biting attack. | — | |
| Summon Werewolves | Geonor lets out a howl and summons five Court Werewolves. | Howl | — |
| Blood Dash | Geonor creates three globules of blood in a straight line in front of him. He then quickly dashes through the line of globules, sending out splatters of blood to the left and right. | — | |
| Blood Slam | Geonor disappears and a red circle appears on the ground. He then crashes down from above with a bloody slam. Despite being a red flash attack, it can be blocked while Geonor is in wolf form. | Red flash |
Phase 2A: Monstrous form
After being reduced to 50% life, Count Geonor transforms into a monstrous wolf-like creature named Geonor, the Putrid Wolf. Phase 2 begins with Geonor restored to full life.
| Skill | Description | Cues | Blockable |
| Double Slash | Geonor slashes twice with his sword while advancing. | — | |
| Leaping Slash | Geonor leaps forward and makes a slashing strike. | — | |
| Frost Cleave | Used when the character is behind Geonor: Geonor cleaves a very large semicircle behind him while turning around. This attack deals cold damage. | — | |
| Blood Slam | Geonor disappears and a red circle appears on the ground. He then crashes down from above with a bloody slam. While Geonor is in monstrous form, his Blood Slam cannot be blocked. | Red flash | |
| Ice Spike Eruption | Geonor plunges his sword into the ground, spreading icy-looking patches over a large area. Upon withdrawing his sword, ice spikes erupt from each patch, dealing cold damage. | I will take out your heart... And savor each bite. I smell your blood... And I am ravenous. | |
| Ice Breath | Geonor exhales a barrage of icy projectiles and creates a patch of chilled ground. This attack deals cold damage. | Desolation. Chilling frost. Freezing gale. | |
| Moonbeam | Used when above 25% life: Geonor points his sword to the sky, which pulses four times. Each pulse sends many beams of light raining down throughout the arena, dealing cold damage where they land. | Requiem on high. Solstice of pain. | |
| Blood Moonbeam | Used only once when reduced to 25% life: Geonor points his sword to the sky, which pulses four times. Each pulse sends many beams infused with blood raining down throughout the arena, dealing cold damage where they land. The beams also appl | — |
Phase 2B: Fog circle
Geonor, the Putrid Wolf will periodically let out a howl, creating a ring of dense fog around the arena to hide himself. This begins a fog circle sub-phase, during which he cannot be damaged.
Each time Geonor enters this sub-phase he recites one stanza of a poem. After lines 2–7 of the stanza, he will dash from a place obscured by the fog across the arena and attempt to strike the character. Tendril Prowlers and Court Werewolves are also brought into the fight from the fog. Geonor will dash a total of six times.
Upon delivering the last lines of the stanza, Geonor will leap into the middle of the arena, clearing the fog and ending the sub-phase. As the fog dissipates, any Court Werewolves and Tendril Prowlers remaining in the arena will die.
| Skill | Description | Cues | Blockable |
| Fog Dash | Geonor quickly dashes across the arena from the fog and tries to strike. | One line of the poem |
Poem
Count Geonor's poem refers to Agnar, the name of his sword.
The poem was written by Grinding Gear Games Audio and Narrative Director, Kane Bennett.
Videos
- Count Geonor was originally called "The Iron Count" prior to Early Access.
- Count Geonor is one of the potential clients for Heist contracts, which requires retrieving the Crest of Ezomyr.
| Version | Changes |
| 0.5.3 | Reduced the damage, area of effect and freeze build-up of Geonor, The Putrid Wolf's Moonbeam skill in all versions of this Boss Fight. Reduced the damage of Count Geonor's Reverse Cleave skill in all versions of this Boss Fight. Reduced the |
| 0.2.0f | Adjusted the behaviour of the 180 degree cleave skill used by Geonor, the Putrid Wolf to prevent them using the skill multiple times sequentially. |
| 0.2.0c | Count Geonor's abilities have had their cooldowns slightly increased (This should result in him using attacks that are parryable more often). |
| 0.2.0 | Count Geonor's 180 degree Swipe attack can no longer be blocked. |
| 0.1.0 | Introduced to the game. |
Jamanra
| Jamanra, the Risen King | |
| Jamanra, the Risen King | |
| Location(s) | The Halani Gates |
| Damage | Lightning, Physical |
| Resistance(s) | Fire, Lightning, Physical |
| Weakness(s) | Cold |
Jamanra, the Risen King is a unique monster located in the Halani Gates.
Encounter
| Dialogue cues | Skill | Skill description |
| "" | Lightning Orbs | Creates a slow-moving lightning orbs that moves randomly around the arena |
| "" | Summon Scarab | Creates a sandstorm and summons several Volatile Beetle adds. |
| "" | Flame Burst | Throws his sword into the ground before him, creating an explosion. A circle will appear around his sword, and after a few seconds the entire arena outside of the circle will be covered in an explosion. |
| "" | Lightning Beam | Points his sword and fires a beam of lightning at the character |
After he reaches 30% Health, he will retreat from the battle.
- Prior to Early Access, Jamanra was called "The Perennial King".
- Jamanra was a cut boss from Path of Exile for Heist league. He was originally supposed to be fought at the end of Nenet, the Scout's contract questline. While several Heist league bosses that weren't available at league launch were added to the game over time, Jamanra and Nenet's questline were never added to the game.
| Version | Changes |
| 0.1.1 | (Hotfix 3) Fixed Jamanra, the Risen King's zombie skirt once more, as it was still spontaneously exploding on death. Jamanra, the Risen King's zombie skirt no longer spontaneously explodes on death. |
| 0.1.0 | Introduced to the game. |
Doryani
| Doryani, Royal Thaumaturge | |
| Doryani, Royal Thaumaturge | |
| Location(s) | The Black Chambers |
| Damage | Fire, Cold, Lightning, Physical |
| Resistance(s) | 30%30% |
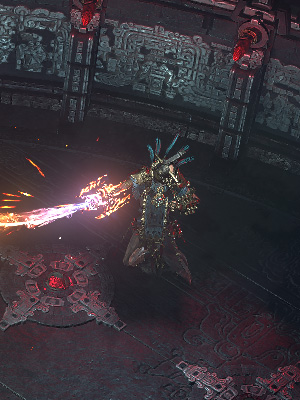
Doryani, Royal Thaumaturge is a unique monster located in the Black Chambers at the Testing Pit. He is the final boss of Act 3. Defeating him is necessary to complete the quest, Legacy of the Vaal.
He can also be found in end game as a citadel boss in The Stone Citadel.
Encounter
Phase 1
| Dialogue cues | Skill | Skill description |
| Flamethrower | Sweeps an area in front with fire from his right gauntlet | |
| Fireball | Shoots a fireball from his right gauntlet which explodes into several mortars on impact | |
| Flameblast | Channels energy from his right gauntlet, creating an orange circle which explodes on reaching max size | |
| Arc | Shoots a quick beam of lightning towards the player from his left gauntlet | |
| "I bear the burden of our future!""The ends justify the means!" | Gauntlet Burst | Charges up both gauntlets, exploding in an area around him with fire and lightning energy |
| Refracting Beam | Creates a cluster of gems before firing a beam of red lightning, which diffracts into an cone after hitting the gems | |
| Tesla Gem | Activates several red gems on the arena's floor; moving nearby will cause the gem to float, firing beams of lightning in an area around it | |
| Burning Orb | Spawns three stationary Burning Orbs in the arena that continuously deal fire damage while standing in its area of effect | |
| "Pathetic!" | Lightning Turret | Raises a rotating gear in the center of the arena which periodically fires beams of lightning across the arena. |
Phase 2 (Doryani's Triumph)
At 50% life, he enters Phase 2 and summons a giant mechanical crab robot called Doryani's Triumph, restoring to full life.
| Dialogue cues | Skill | Skill description |
| Swipe | Performs a quick swipe with one of its claws | |
| Ice Crush | Slams with its left claw infused with cold | |
| Head Slam | Separates its head from its body, slamming it down on the ground | |
| Claw Slam | Performs two slams using its front claws | |
| Claw Burst | Charges up both claws, exploding in an area around it with fire and cold energy | |
| "Full power!" | Tesla Coils | Coils on the machine overload with lightning, continuously shooting arcs in an area around it that shoot outwards |
| "I've got you now!" | Flameblast | Embeds its right claw into the ground, creating an orange circle which explodes on reaching max size |
| Flame Pillar | Creates a vertical beam of fire which lasts for a duration | |
| "Blaze!" | Fire Beam | Fires a fire beam from its right claw |
| Enhanced Fire Beam | Fires a fire beam from its right claw; the beam then turns into red lightning and is swept in a half circle | |
| '"Freeze!" | Cold Beam | Fires a cold laser from its left claw which can move horizontally |
| "Now! All in my grasp." | Lightning Beam | Converts four of its legs into a flying turret, which charges up and fires a beam of red lightning periodically |
| "Activate the beams!""Fool!" | Laser Storm | Fires several lasers from the robot's rear in a cone shape, rotating and spinning around the arena. |
| "Face your ambition.""Know destruction!" | Magnetism Slam | Explodes the robot in a large burst of lightning, then condenses the pieces of the robot into a giant ball, tracking the player for a duration before slamming in a large area |
Gallery
Videos
| Version | Changes |
| 0.3.0 | The life of most Act 3 Bosses has been reduced by approximately 15%. |
| 0.1.0 | Introduced to the game. |
Tavakai
| Tavakai, the Chieftain | |
| Tavakai, the Chieftain | |
| Level(s) | 53 |
| Location(s) | Heart of the Tribe |
| Quest(s) | The Search |
| Resistance(s) | (Light Fire Resistance only in Phase 1) |
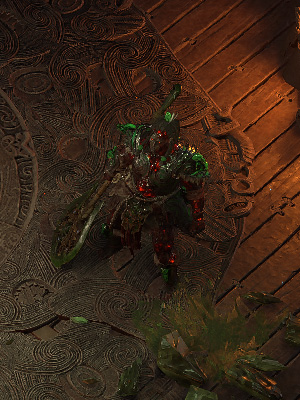
Tavakai, the Chieftain is a unique monster located in Heart of the Tribe. He is the final boss of Act 4. Defeating him is necessary to complete The Search.
Encounter
Phase 1
- Hook Throw: Throws his hook out forward, lingering for a duration before pulling it back.
- Like Tukohama! - Tukohama Slam: Conjures a spirit of the ancients, slamming down in a large area
- Your bones will shatter! -Rolling Slam: Deals a series of three slams in quick succession while moving.
Phase 2: The Fallen
After reaching 50% life, Tavakai will transform into Tavakai, the Fallen, recovering to full life and running away to a secondary circular arena made of stone.
- Melee Combo: Cleaves while walking forward using both the Precursor weapon and his axe.
- Weakness becomes you! - Corrupted Barrage: Channels corruption from the Precursor weapon, firing a wide barrage of red energy.
- Jade Sunder: Swipes upwards with his axe, creating a cone-shaped shockwave that leaves behind three "Warrior Spirit" minions out of jade.
- Leap Slam: Jumps into the air before slamming down in an area.
Phase 3: The Consumed
After reaching 20% life, Tavakai will become invulnerable and attempt to call for Tukohama's aid, but will fail to recieve the god's blessing. He will then transform into "Tavakai, the Consumed".
- Sunder Combo: Swings an engorged arm into the ground three times in random directions, creating a large cone-shaped shockwave of spikes on the third slam. The spikes persist for a duration.
- Rage burns deep... and by morn.. you shall fear the name... Karui! - Melee Combo: Moves around while attacking five times in quick succession.
- Leap Slam: Jumps into the air before slamming down in an area.
- Your bones will shatter! - Corruption Spikefield: Channels an arm into the ground, creating spikes of corruption throughout the arena that persist for a duration.
During the "Tavakai, the Consumed" phase, the arena will also periodically have different arena hazards:
- Tawhoa's Blessing: Fills the perimeter of the arena with plants, slowing down movement speed.
- Ramako's Blessing: Creates a Solar Orb that fills the arena with expanding Ignited Ground before exploding.
- Arohongui's Blessing: Bombards an area with a large lunar beam that deals cold damge over time.
Gallery
Videos
| Version | Changes |
| 0.4.0 | Improved the first phase change sequence of the final Act 4 boss |
| 0.3.0 | Introduced to the game. |
The Devourer
| The Devourer | |
| The Devourer | |
| Level(s) | 3 |
| Location(s) | The Mud Burrow |
| Quest(s) | Treacherous Ground |
| Damage | Physical, Chaos |
| Resistance(s) | Physical |
The Devourer is a unique devourer located in the Mud Burrow at the Vile Nest.
Encounter
- Swipe: Swipes with root-like appendages near its head
- Slam: Slams the ground in front with its head
- Spit Mortar: Fires a mortar projectile at the player's feet
- Poison Projectiles: Fires an arc of several green projectiles which apply Poison
- Burrow: Charges up a red area before bursting out of the ground, spawning several Flesh Larva
- Sunder: Uses its tail to create a forward-moving shockwave
The Devourer will continuously dig back and forth around the arena. Only the head and tail can be directly targeted and damaged.
Videos
| Version | Changes |
| 0.1.0 | Introduced to the game. |